Supplies
cork board 14X14
transparency paper – rub on words/letters and numbers work just as well
access to printer
black permanent marker
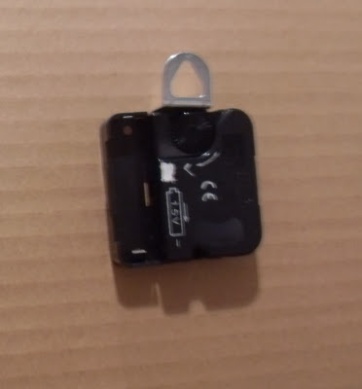
clock parts
clock hands (optional)
power drill
Directions–
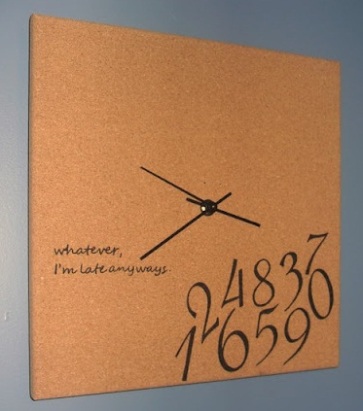
1. The instructions I found indicated that you should print the numbers and words on transfer paper however if you scrapbook at all, you probably have some rub on or pre-made transfers that you haven’t used… The point is to have all the numbers (for a normal clock) and then the words “whatever, I’m late anyways” or what I will probably end up using is “whatever, I’m always late”.

2. Next cut each number and word out.
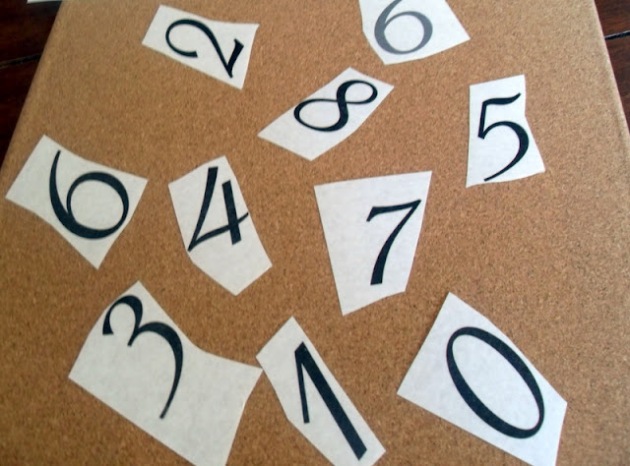
3. Remove glossy film and place sticky side over the paper. Be careful not to rub it in or you will smudge your ink. Repeat this step for all your numbers and word phrase.
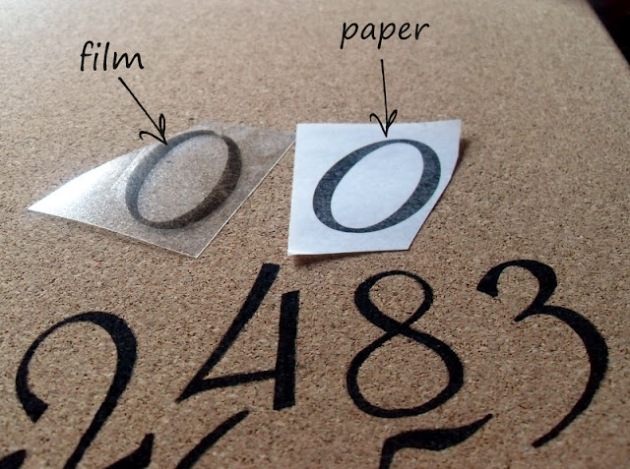
4.Take your film and stamp it onto your cork board. Gently remove the film or you will take off some cork excess. Repeat this step for all your numbers and word phrase.

5. Trace numbers with a black sharp point tip permanent marker. Repeat this step for all your numbers and word phrase.

6. After you have traced your numbers you can now add the phrase “whatever I’m late anyways”.

7. Now it’s about that time to add your clock.

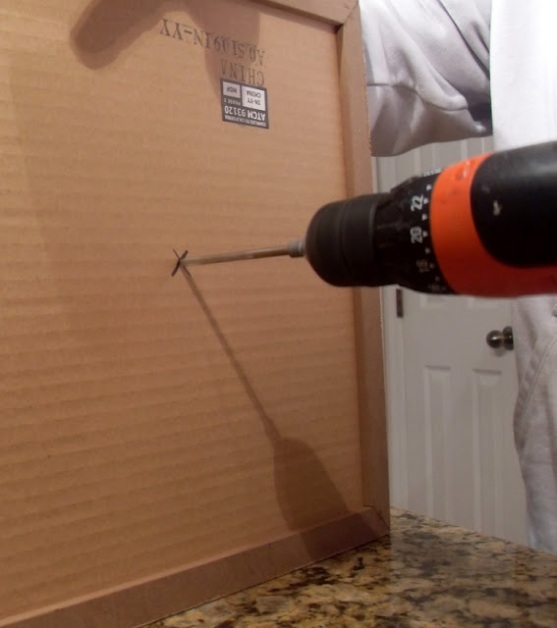
8. Turn over corkboard, measure, mark the center and drill.
9. Now your ready to put your clock parts starting thru the back. Follow the directions that came with the package.
10. Last step, your clock is now ready for batteries. You’re now finished…